Generating a report with dynamic images from a MYSQL database
In this tutorial, we will show you how to generate a simple report with dynamic images using Smart Smart Report Maker . The report should display dynamic images based on data stored in a certain table in a MySQL database .
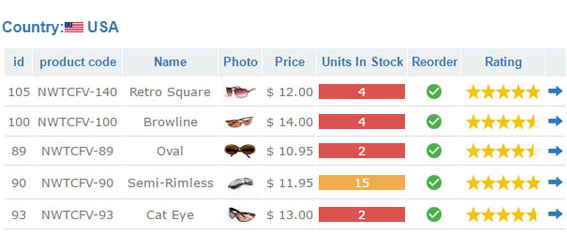
When a user clicks on any image in the generated report a pop up window should appear containing the clicked image with its actual size as in this report
Let’s assume we have a MySQL database for storing items data of a store, in a real life scenario, many tables and columns will be included. But in this tutorial, we will focus only in one table, the “Items” table and one column, the “Photo” column which saves the items file names, as shows in the image below.

Generating this report using Smart Report Maker couldn’t be easier!! You will first need to login to smart report maker then click on “Create new report” to start the report generator wizard .

- The first step of the wizard is for establishing a connection with your MySQL database. Once that is done you should select the data source . Please select the “Table” data source then click “Next“
- In the second step (The “data Source” step) of the wizard, you should find the names of all the tables of your MySQL database. In this tutorial we should use the “Items” table as shown in the image below.
- In the third step (The “columns” step) of the wizard we should select the columns of the report , so we should make sure that the “Photo” column is selected .
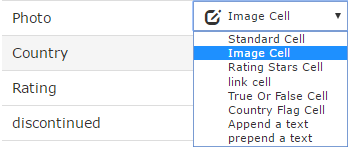
- In the forth step (The “Cells” step) of the wizard we should select the type we want for each column, so for the “Photo” column we should select “Image Cell” type as shown in the following image

- Complete the last two steps of the wizard with the grouping , security, layout, style and language settings that fits your needs.
- Once the report is generated successfully, you wont see any images in it! That’s because you still need to specify the images directory (the directory which contains the images whose names are stored in your database) .
To set the images directory path you have two options :
- The first option: Put all the dynamic images in a sub-directory with the name “images” inside the directory of your generated report “/SRM7/SRM/Reports7/Your-Report-directory/”
- The second option: Download the configuration file of your generated report (which can be found at /SRM7/SRM/Reports7/Your-Report-directory/config.php) via FTP then do the following steps:
- Open the configuration file with any text editor like notepad++.
- Search for the following line of code :
$images_path = “images/”; - Replace the “images/” with the relative path of your images directory, something like :
$images_path = “../../../../my_images_directory/”; - Save the configuration file then upload it back to the exact same location (i.e. /SRM7/SRM/Reports7/Your-Report-directory/config.php)
- That’s all you need to get the report done


