Creating PHP MySQL Master-Detail Forms Using using Smart Form Maker

The newest version of Smart Form Maker allows you to build powerful PHP MySQL Forms in master-detail layouts, also known as PHP sub-forms. This advanced PHP MySQL Form Builder makes it easy to define table relationships and view related records together in a single PHP form.
Understanding PHP Master-Detail Forms and Sub-Forms
A PHP master-detail form displays data from two related MySQL tables in one interface. The master section shows the main record (for example, a customer), while the detail section lists all related child records (for example, that customer’s orders).
With PHP sub-forms, the detail records are embedded directly inside the master form, giving users a complete view of related data without navigating to another page.
In this tutorial, we will create an orders-per-customer PHP MySQL form that lets you manage customer data and their related orders using just one PHP master-detail form.
Let’s assume you have a MySQL database with two related tables:
- Customers: stores customer contact information. It contains a primary key column named Customer_ID.
- Orders: stores order data. The Customer_ID column here is a foreign key that links each order to its customer.
In this example, the master form will display customer information, while the detail sub-form will list all orders related to the selected customer.
How to Create PHP MySQL Master-Detail Forms Using Smart Form Maker
Building this PHP MySQL master-detail form using Smart Form Maker is very simple. Just follow these steps:
- Establish a connection to your MySQL database using the connection step in Smart Form Maker.
- Since the Customers form is the master form in this tutorial, select the Customers table as the data source.
- Select all form actions to allow inserting, updating, navigating, and deleting records from both tables. Then click Next.
- In the Fields step, select the fields you want to show in the master form. Fields highlighted in red are required and are auto-selected by Smart Form Maker. Click Next to continue.
-
In the Settings step, configure master form fields by:
- Assigning friendly labels
- Marking required fields
- Defining validation rules
- Click Next to proceed.
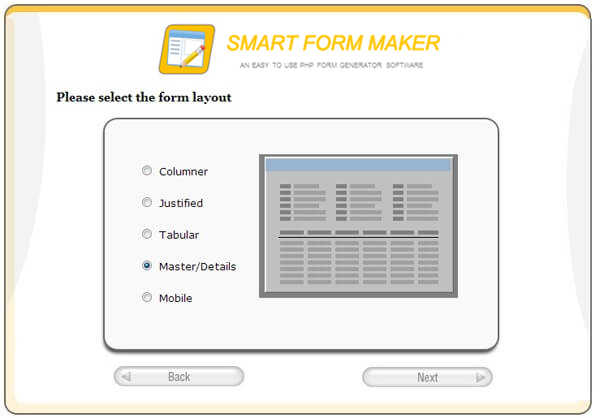
- In the Form Type step, choose Master / Details.
-
After selecting the Master / Details form type, a configuration window will appear.
Define:- The detail table data source (Orders table)
- The joining column (Customer_ID)
- Customize the detail sub-form by selecting its fields, labels, and validation rules, just like the master form.
- Your generated PHP MySQL master-detail form should look similar to the image below:

Why Use a PHP MySQL Form Builder for Master-Detail Forms?
Using a PHP MySQL Form Builder like Smart Form Maker saves development time and eliminates repetitive coding.
You simply upload the PHP files to your server and start using it out of the box—no command line, no configuration, and no setup hassles.
With this visual PHP MySQL Form Builder, you can create PHP MySQL Forms directly from your existing
MySQL or MariaDB databases, including PHP master-detail forms, PHP sub-forms, and other form types,
without writing PHP, SQL, or JavaScript code.
All generated PHP forms are AJAX-based, so data is submitted and records are loaded dynamically without reloading the entire page,
giving users a smooth and modern application experience.
This approach reduces errors, ensures consistency, and allows you to focus on your
application’s business logic instead of form plumbing.
Related Links
- Smart Form Maker Home Page
- Smart Form Maker Demo Version
- Smart Report Maker Home Page
- Video Tutorials
Frequently Asked Questions (FAQ)
Q: What is a PHP master-detail form?
A: A PHP master-detail form displays data from two related MySQL tables in one interface.
The master section shows the main record (such as a customer), while the detail section
lists related records (such as that customer’s orders).
Q: What are PHP sub-forms?
A: PHP sub-forms are embedded detail forms that appear inside a master form.
They are commonly used to display child records related to a selected parent record
in a PHP MySQL application.
Q: Can I build PHP MySQL master-detail forms without coding?
A: Yes. Smart Form Maker is a PHP MySQL Form Builder that lets you create PHP master-detail forms
and PHP sub-forms using a visual wizard—no PHP, SQL, or JavaScript coding required.
Q: Does Smart Form Maker support real database relationships?
A: Yes. Smart Form Maker allows you to define real MySQL foreign-key relationships between tables
and automatically generates the corresponding PHP MySQL forms.
Q: Can I customize both the master form and the sub-form?
A: Yes. You can fully customize both the master form and the detail sub-form, including field labels,
validation rules, required fields, layouts, and styles.

