This page is intended for users who are currently using SRM version 9.0 or later. If you are using a version older than 9.0, do not follow the steps on this page. Instead, please contact our support team for assistance.
In this post, we will cover how to update Smart Report Maker via Composer. The process is divided into the following sections:
- Preparation for Smart Report Maker Upgrade: This section outlines the steps required to prepare for updating Smart Report Maker on both Linux and Windows systems.
- Updating Smart Report Maker on Linux: Detailed steps to update Smart Report Maker on Linux distributions such as Ubuntu, Fedora, Debian, Red Hat, and CentOS.
- Updating Smart Report Maker on Windows: Instructions for updating Smart Report Maker on Windows systems.
Preparation for Smart Report Maker Update
Step 1: Review the file structure
In this step, you should familiarize yourself with the files included in the new version, which you should have downloaded recently.. Inside the new version of SRM (the one that matches your PHP version), you should find the following files and folders:
- The “
srm” directory – Contains the system files for the new version. install.sh– A shell script that automates the installation of Smart Report Maker on Linux systems. This should only be used for fresh installations, not for updating an existing version. If you prefer to perform a fresh installation of SRM instead of updating an existing version, please use the following link.install.ps1– A PowerShell script that automates the installation of Smart Report Maker on Windows systems. This is also intended for fresh installations only.update.sh– Used to update an existing installation of SRM on a Linux system.update.ps1– Used to update an existing installation of SRM on a Windows system.
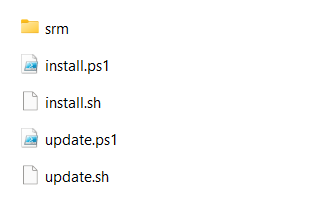
Note: The image shows the contents of the downloaded new version. We only need the srm directory and the update script that matches your operating system.
Step 2: Back Up Your Old SRM Version
Before starting the upgrade process, it’s strongly recommended to back up your existing SRM system. This ensures you can restore it if anything goes wrong during the upgrade.
To create a backup:
- Locate your current SRM installation — it should be in a folder named “srm”, typically found within your root directory.
- Compress the entire
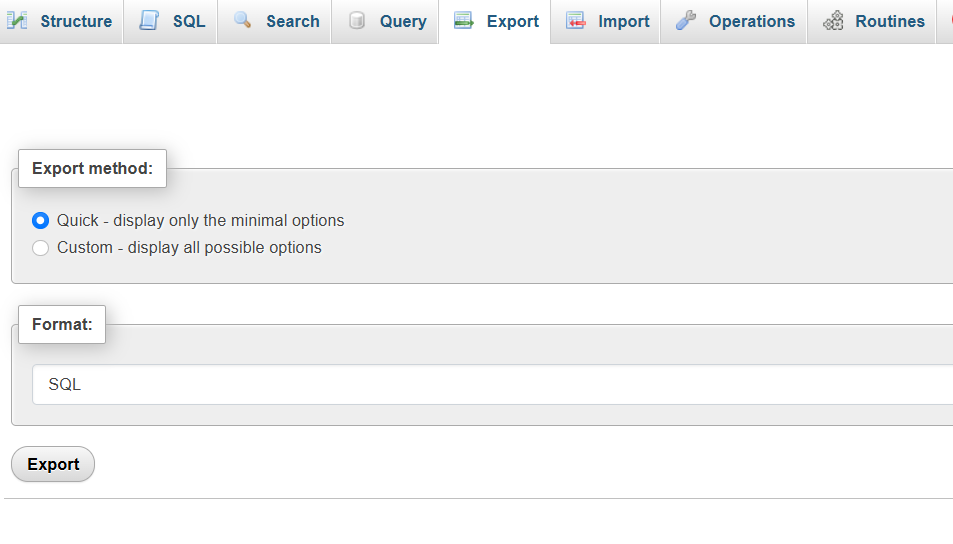
srmfolder into a zip file. For simplicity, you can name it something likesrm_backup.zipand store it in a safe location. - Back up the SRM database –
- Open phpMyAdmin or any MySQL client.
- Select the database you used when installing SRM.
- Export the entire database to create a SQL dump file (e.g.,
backup.sql) that contains both the data and structure.
Step 3: Rename the Existing “srm” Directory
In your existing SRM installation, rename the current srm directory to srm_old, as shown in the image below.
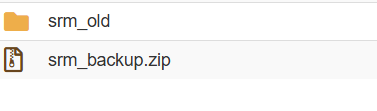
Note: The image shows the renamed old version (srm_old) and the backup created in Step 2.
Updating SRM on a Windows system
Note: Make sure you have completed the preparation steps (Step 1, Step 2, and Step 3) mentioned above. These steps are common to both Windows and Linux systems.
Step 4: Upload the New Version of SRM
If you’re working on your local PC, please copy the new srm directory from the version you downloaded, along with the update.ps1 script, and paste them into the same directory that contains srm_old. The folder structure should then look like the image below.
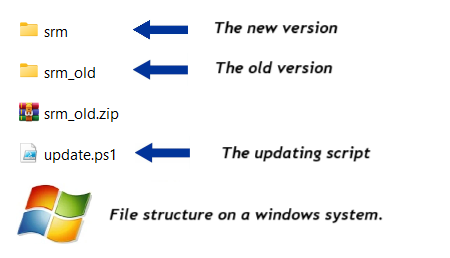
Note: The image shows the renamed old version (srm_old), the newly uploaded version (srm), and the update script (update.ps1) placed in the same directory.
Step 5: Temporarily Disable Your Antivirus for the Installation Process
We’ve noticed that some antivirus programs may block Composer while it’s downloading dependencies. To avoid this issue, please open your antivirus software (e.g., Bitdefender, Avast, Kaspersky, Norton) and look for an option such as:
- “Pause Protection”
- “Temporarily Disable Guard”
- “Turn Off Real-Time Protection”
Choose a temporary duration (e.g., 10 minutes or 1 hour) and confirm the action.
Step 6: Execute the Upgrade Script
Run your PowerShell command prompt as an administrator by following these steps:
- Press the Windows key and type “PowerShell.”
- Right-click on Windows PowerShell from the search results.
- Select Run as administrator from the context menu.
Change to the directory containing srm, srm_old, and the update.ps1 script:
cd "C:\path\to\update\directory"Verify that the update.ps1 script, along with the srm and srm_old directories, are present in the current directory by running the following command:
lsNote: You should see update.ps1 listed in the output, along with the srm and srm_old directories.
Set the PowerShell Execution Policy and run the script:
powershell -ExecutionPolicy Bypass -File .\update.ps1Step 7: Validate the Updated Version
Log in to your SRM system using the same URL and your existing credentials.
You should see all your data exactly as it was, now enhanced with the new features included in the latest version.
To confirm the version number, click the About icon located in the top-right toolbar.
Step 8: Clean Up After a Successful Upgrade
Once you’ve confirmed that the upgrade was successful:
- You may safely delete the following items:
srm_old(the renamed old version)existed_resources(temporary update files)update.ps1(The updating script)
These files and folders should be located at the same
if the Upgrade Was Not Successful
If something went wrong during the upgrade:
- Check the
update.logfile for detailed error messages. - Review the
.progressfile to see how far the process went. - You may choose to retry the upgrade or roll back to the previous version using the
srm_oldfolder and your database backup.
Updating SRM on a Linux system
Note: Make sure you have completed the preparation steps (Step 1, Step 2, and Step 3) mentioned above. These steps are common to both Windows and Linux systems.
Step 4: Upload the New Version of SRM
Upload the new srm directory from the version you downloaded, along with the update.sh script.
Your directory structure should now look like the one shown in the image:
srm_old– the renamed folder of your old SRM versionsrm– the new version’s folder you just uploadedupdate.sh– the script used to complete the upgrade process
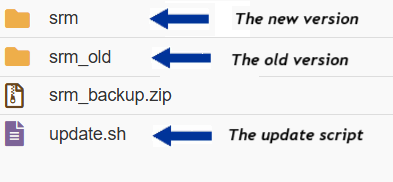
Note: The image shows the renamed old version (srm_old), the newly uploaded version (srm), and the update script (update.sh) placed in the same directory.
Step 5: Set Proper Permissions
For all the upcoming commands, you need to navigate in your terminal to the directory that contains the update script, as well as the srm and srm_old directories. We’ll refer to this as the update directory.
You can do this using the following command:
cd /path-to-update-directory
Make sure to replace /path-to-update-directory with the actual path.
To confirm you’re in the correct directory, run:
ls -ahl
You should see update.sh, srm, and srm_old listed in the output.
Then, To ensure that the srm directory has 755 permissions and the update script has execute permission, please run the following command:
chmod +x update.sh && chmod 755 -R srmStep 6: Execute the Upgrade Script
To start the upgrade process, run:
bash update.shif you encounter an issue due to permissions you can try the following command instead:
sudo chmod +x update.sh && bash update.shAs an alternative, you can run this command:
sudo chmod +x update.sh && ./update.shStep 7: Validate the Updated Version
Log in to your SRM system using the same URL and your existing credentials.
You should see all your data exactly as it was, now enhanced with the new features included in the latest version.
To confirm the version number, click the About icon located in the top-right toolbar.
Step 8: Clean Up After a Successful Upgrade
Once you’ve confirmed that the upgrade was successful:
- You may safely delete the following items:
srm_old(the renamed old version)existed_resources(temporary update files)update.sh(The updating script)
These files and folders should be located at the same directory level as the srm folder.
⚠️ Important: Do not delete the backup you created in Step 1. Keep it stored securely in case you need to restore your system in the future.
If the Upgrade Was Not Successful
If something went wrong during the upgrade:
- Check the
update.logfile for detailed error messages. - Review the
.progressfile to see how far the process went.
Summary
- You can upgrade SRM version 9.0 or later to the latest version.
- Versions earlier than 9.0 are not supported by this guide.
- The upgrade process supports both Linux and Windows systems.
The process begins with a set of common steps required for both operating systems. These include understanding the file structure of the new version and creating a backup of your existing SRM installation. It’s important to keep this backup even after the upgrade, in case anything goes wrong.
After completing the common steps, you’ll follow OS-specific instructions (for either Windows or Linux), which involve copying the necessary files and running an automation script that handles the upgrade.