Starting from Smart Report Maker version 11, we introduced a brand-new installation method based on many customer requests. This new method is designed to be the simplest way to install SRM.
- ✅ Simply upload the files, launch the web installer in your browser, and it works out of the box.
- ✅ No terminal required.
- ✅ No shell commands.
- ✅ No Docker, virtual machines, or other containerization technologies.
- ✅ No server or DevOps expertise required.
- ✅ Open-source PHP code — you can view and inspect the files.
You simply upload SRM to your website, open a web installer in your browser, and complete the setup in a few clicks.
This method works seamlessly with:
- Shared hosting or dedicated servers.
- Any hosting control panel, such as :
- cPanel
- Plesk
- CWP (Control Web Panel)
- DirectAdmin
- Webmin
- Virtualmin
- ISPConfig
- CyberPanel
- HestiaCP
- VestaCP
- aaPanel
- Ajenti
- Froxlor
- SolidCP
- CloudPanel
- RunCloud
- ServerPilot
- Laravel Forge
- Any hosting provider that supports PHP.
Installation Steps
Step 1 — Download the Correct SRM Version
- Log in to the Smart Report Maker Download Area using the credentials you received after completing your purchase.
- You will be asked to download the SRM package that matches your PHP version
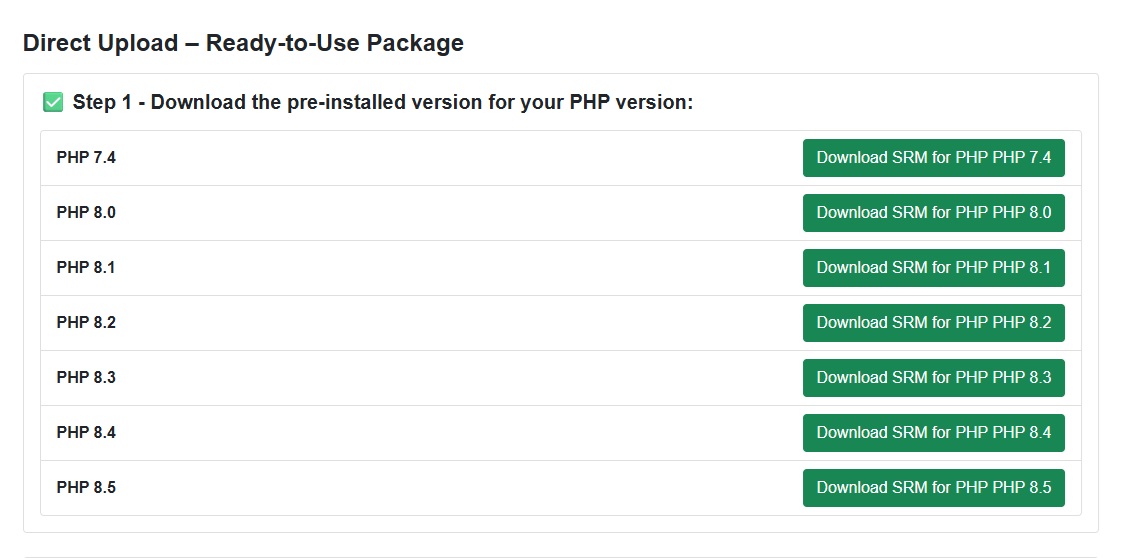
Smart Report Maker is provided for each PHP version starting from PHP 7.4 up to the latest version (currently PHP 8.5).
✔ The downloaded files are pure PHP, optimized and fully compatible with your selected PHP version.
Step 2 — Upload SRM to Your Web Server
Extract the downloaded archive
You will get a folder named srm
Place the srm folder in:
- Your web server root, or
- A subdirectory under the web root (as long as it can be accessed via a browser)
Common Web Root Locations
- Linux (Apache / Nginx)
/var/www/html - cPanel /home/username/public_html/
- Plesk /var/www/vhosts/example.com/httpdocs/
- Windows (XAMPP)
C:/xampp/htdocs/ - Windows (WAMP)
C:/wamp/www/ - Windows (Laragon)
C:/laragon/www/
⚠️ Important – Hosting Control Panels (cPanel, Plesk, etc.)
If you are using a hosting provider with a control panel:
- Compress the
srmfolder into a ZIP file - Upload it using your hosting File Manager
- Place it inside your web root directory
- Extract the ZIP file after upload
- Delete the ZIP file after extraction
Step 3 — Set Read / Write Permissions
Make sure the following directories are writable:
- /srm/dashboard/config
- /srm/dashboard/storage/logs
- /srm/modules/SRM9/SRM/Reports9
On most hosting providers, this can be done directly from the File Manager by setting permissions to 755 or 775 (or as recommended by your host).
Step 4 — Open the Web Installer
Open your browser and visit the installer URL:
- Online installation
https://yourdomain.com/path-to-srm/srm/dashboard/setup - Local installation
http://localhost/path-to-srm/srm/dashboard/setup
Replace path-to-srm with the directory name where the srm folder is located.
If SRM is placed directly in the web root, no additional path is needed.
Finish the Installation
Once the web installer loads:
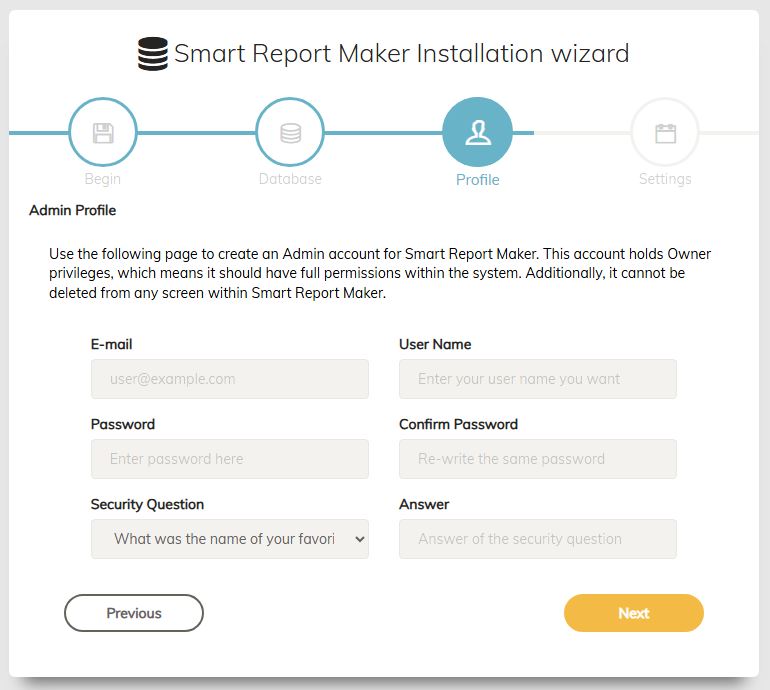
- Follow the on-screen steps
- Complete database and configuration setup
- Finalize installation
🎉 That’s it!
Smart Report Maker is now installed and ready to use.