⚠️ Important Note
Having a hosting control panel such as cPanel, Plesk, or CWP does not require you to use a panel-specific installation method. The Direct Upload Method works seamlessly with cPanel, Plesk, and CWP and remains the simplest option across all hosting types and control panels, while the method listed below is provided as an optional alternative.
This post explains how to install Smart Report Maker using CWP (Control Web Panel). Smart Report Maker provides an installer script that automates the installation across various environments, including Linux distributions such as Ubuntu, Fedora, Debian, Red Hat, and CentOS, with support for both Apache and Nginx. However, since CWP primarily runs Apache (optionally with Nginx as a reverse proxy), these instructions focus on installing Smart Report Maker with Apache on a Linux server managed through CWP.
1. Prepare your files
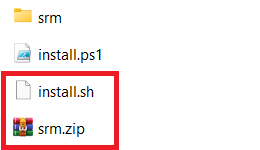
After purchasing and downloading the full version from our download area, navigate to the directory matching your server’s PHP version. You will find:
srmdirectory – Contains all system files.install.sh– Shell script for Linux installation.install.ps1– PowerShell script for Windows (not needed here).
Tip: Compress the srm directory into .zip or .tar.gz before uploading to speed up the transfer.
2. Upload your files in CWP
- Log in to the CWP User Panel.
- Go to File Management → File Manager from the left-hand menu.
- Navigate to the desired location inside the
public_htmlfolder (or another subdirectory) — this will be your installation directory. - Upload the archived
srmdirectory and theinstall.shscript. - Select the archive and click Extract.
- Make sure the structure is correct:
- The
srmfolder contains subdirectories such asdashboard,modules, andsrm_install. - Both the
srmdirectory and theinstall.shscript are at the same directory level.
- The
3. Set correct permissions
- In File Manager, locate the
srmfolder. - Click the Permissions (or CHMOD) icon next to it.
- Set the permission value to 755 and save.
- Do the same for the
install.shfile. - Ensure
install.shhas execute permissions; otherwise, it will fail to run.
4. Create or assign a MySQL database
Smart Report Maker requires a MySQL database to store its own internal system data — including processes, user accounts, user groups, permissions, settings, and scheduling information.
- In the CWP User Panel, go to SQL Services → MySQL Manager.
- Either use an existing MySQL database or click Create Database to make a new one.
- If creating a new database:
- Enter a database name.
- Create a new MySQL user and assign a secure password.
- Assign the user All Privileges on the database.
Note: You can use a database that also stores your reporting data, but most users prefer creating a separate database so SRM’s internal data remains isolated.
5. Access the terminal in CWP
To run the installation script, you’ll need shell access.
- In CWP User Panel, go to File Management → Terminal.
- In some themes, Terminal appears under the Tools section.
- If Terminal is not available, your hosting provider may have disabled it. In that case, you can connect via SSH using a terminal application on your computer. For guidance on setting up an SSH connection via cPanel, please refer to this post
6. Run the installation script
After login to your terminal or ssh connection run the following commands:
- Verify your current location by running:
ls -ahl- Move to the installation directory where you uploaded both the “srm” folder and the “install.sh” script by running the following command:
cd path_to_your_installation_directory- Confirm that both the “srm” folder and the “install.sh” script are present in the current directory and have the correct permissions by running:
ls -ahl- Once you run the installer, it will perform the following tasks:
- Check if Git is installed. If Git is available, it will use it; otherwise, it will install Git and its dependencies.
- Execute all necessary commands to install Smart Report Maker’s dependencies using Composer.
- Create the necessary symbolic links (soft links).
- Create a cron job for sending scheduled reports.
- Adjust the directory permissions as required.
- To run the installer, use this command
./install.shIf you encounter ./install.sh: Permission denied, please run the following command:
sudo chmod +x install.sh && ./install.sh- If you are using Apache, The installer will complete all tasks mentioned in the previous points and display a success message with zero errors.
- If both Nginx and Apache are detected on the server, the installer will prompt you to choose which web server to use, with cPanel please choose Apache.
- Once the installer finishes and displays a success message with zero errors, delete the installer script by running the following command:
rm -f install.sh
- If you’re unable to delete
install.shfrom the command line, you can use File Manager to remove it.
7- Complete setup
Finally, open your preferred web browser and go to:
https://your_domain_name/path-to-your-Installation-Directory/srm/dashboard/setup
Note: Use the following URL only if the URL in point 9 results in an error.
https://your_domain_name/path-to-your-Installation-Directory/srm/dashboard/public/index.php/setup
If this alternative works, please investigate why the redirection in the .htaccess file didn’t work, as it’s important for security reasons.
After successfully launching the web installer, click here to proceed with the installation.